Pages

Subscribe:

Labels

Saturday, 3 September 2011

G11i (Dual SIM)

Introduction

As I already mentioned on my previous post, MediaTek has released a new platform and the first MT65x3 based smartphones are now appearing. This review will focus on the G11i, a clone of HTC Incredible S, featuring the new MT6513 chipset.

Specifications

Chipset

Name:MediaTek MT6513
CPU:650 MHz ARM11™
GPU:PowerVR™ SGX 531
Instruction set:ARMv6

Software environment

Embedded:OS: Android 2.3.4 (Gingerbread)

Body

Dimensions
(width x height x depth):
120 x 64 x 11.7 millimetres
Weigth:140 grams
Color:Black

Battery

Capacity: 1450 mAh

Memory

RAM:capacity:512 MB
ROM-capacity:512 MB
Expansion slot:microSD memory card, supporting up to 32 GB

Network support

Primary phone:GSM850, GSM900, GSM1800, GSM1900
Secondary phone:GSM850, GSM900, GSM1800, GSM1900
Data links:GPRS, EDGE

Display

Type:Sharp LCD capacitive touchscreen
Size:4.0 inches, WVGA resolution (480 x 800 pixels)

Camera

Main (rear):8 megapixels (interpolated) with autofocus and dual LED flash
Secondary (front):1.3 megapixels

Interfaces

Bluetooth (802.15):Bluetooth 2.1 + Enhanced Data Rate
Wireless LAN / Wi-Fi (802.11):  IEEE 802.11b, IEEE 802.11g
USB:USB 2.0 Client, Hi-Speed (480 Mbit/s)
USB Series Micro-B (Micro-USB) connector

Satellite navigation

Built-in GPS module:MT6620 chipset
GPS antenna:Internal
Complementary GPS services:  A-GPS (Assisted GPS), MediaTek EPO (Extended Prediction Orbit)

Additional features

Sensors:
Gravity, Proximity and Light sensors
Analog Radio:FM radio (87.5-108 MHz) with RDS radio receiver

Design and construction

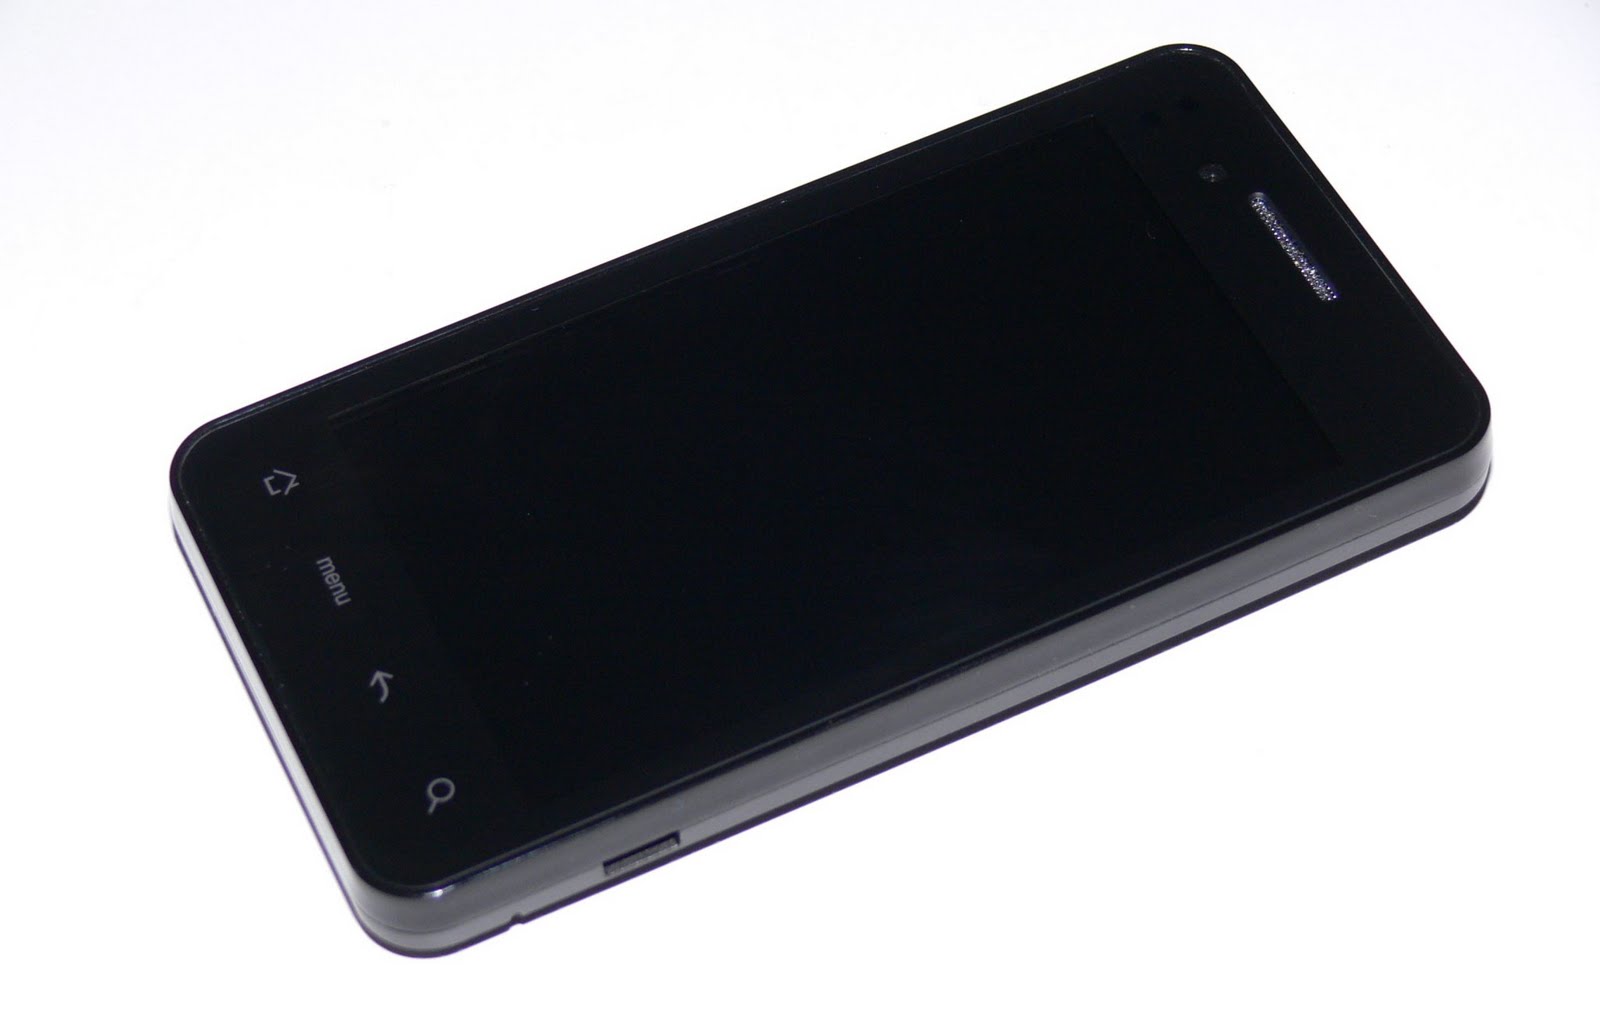
G11i is a very well built copy of Incredible S, which is distinctive due to its contoured and unmistakable rear patterned design. Since its capacitive touch buttons aren't printed on, we are presented with a completely clean looking surface.


Constructed out of black plastic, its soft touch feel all around enables it to better repel dirt, while providing that adequate firm grip as we hold it.


Thanks to the front-facing 1.3-megapixel above its display, we’re given the opportunity of video calling and shooting self-portraits more easily.


The narrow looking volume rocker is positioned on the left edge of the phone, but despite its flushed appearance, it actually exhibits a reasonable tactile response. Also, the micro-USB port is located on the same side as well for charging and data connection. Meanwhile, the top edge plays host to both the 3.5mm headset jack and dedicated power button – the latter of which is recessed, but still provides a moderate tactile feel when pressed down.


On the back side, we find the 8 megapixels autofocus camera with dual-LED flash and speaker grill located towards the top edge of the handset.


Placed squarely in the middle of the bottom edge, there is a small notch that allows you to easily yank off the rear cover – thus giving you access to the SIM card slots, battery and microSD card slot.


The two SIM slots can only be accessed after removing the battery. As far as it concerns to the microSD slot, it's easily accessible (while rear cover is removed) and as it can be seen, the memory card is hot-swappable.

Display quality and touch-screen

As well as with the previous phones that I've reviewed, G11i also brings a Sharp LCD screen, so quality is preety much the same. 


It features a capacitive display with a WVGA (800x480) resolution. The display produces some rich looking colors that retain their luster since it offers some great viewing angles. During my tests, I had zero problems in trying to view it in outdoor conditions with the glaring sun present.


At first, some might be surprised to find a clean looking front surface, but turning on its display, its capacitive touch buttons come to life. Interestingly enough, they don't appear to be painted on, but rather, they seem to be nothing more than LEDs underneath there.


Functionality

From the moment G11i is turned on, we're presented with the new Gingerbread interface. One of the features that can be noticed from the start is the new place for shortcuts on the notification panel, giving the user a fast access for brightness and display timeout setting, enabling or disabling auto rotation, Wi-Fi, BT, GPS and data connection, as well as alternating between sound profiles.


And just when I thought that dual SIM integration on HD9 was good and couldn't get any better, that's when I got amazed with the refreshed interface. In call history screen, the list of missed / received / made calls can now be checked with the indication of the name of the SIM. In addition, you can filter calls by SIM.


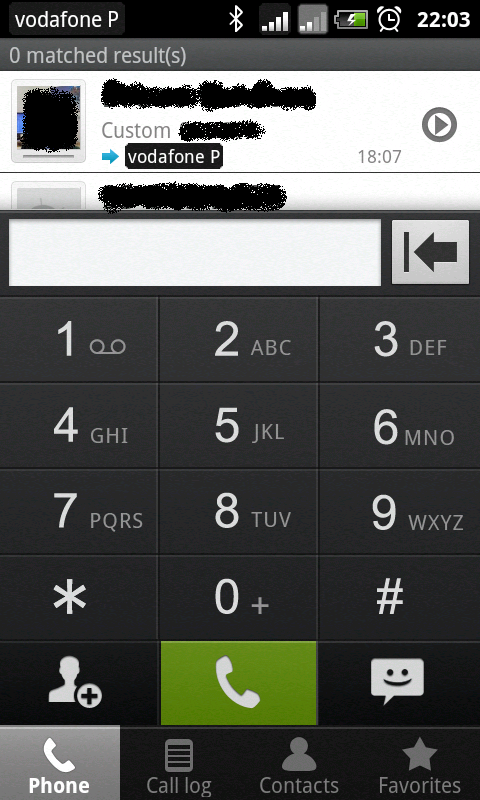
Apart from the new dialer interface, it also brings a smart dialing feature which works wonderfully, enabling you to numerically enter a name, even if it's incomplete (i.e. 8632 for Vodafone, as seen on the picture) and  displaying all matches instantly. With this new dialer, it doesn't exist anymore the two call buttons to choose which SIM should establish the call. Instead, the green call button can immediately start the call when set to a certain SIM card or open a pop up which let's you choose it every time.


It's hard not to accept that this new user interface was definitely thoroughly developed.

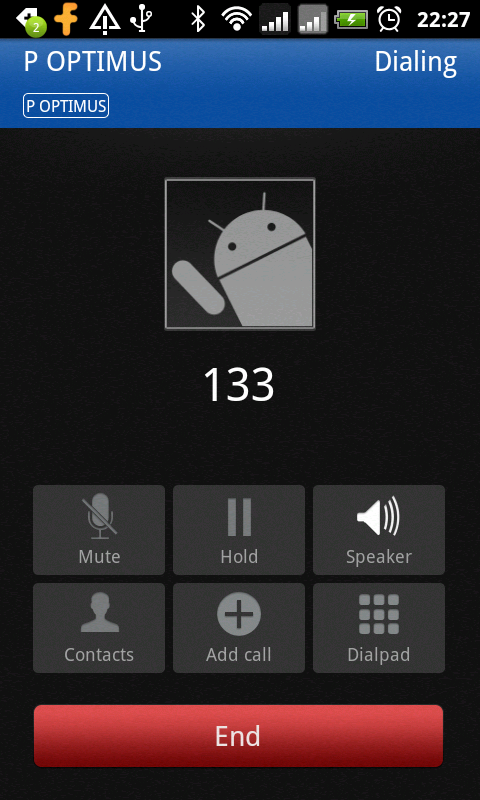
Many new options can now be set under the dual SIM management menu. The user can edit the name of each SIM and also set the associated background color that will appear in call log as well as in the notification bar (behind the network strength bars).


Other than that, also in the same menu, the user has the possibility to set a default card to establish all outgoing calls or set it to always ask, thus enabling the pop up that can be seen some images above showing the dialer (with the options of which SIM card should initiate the call). The same thing can be set for messaging and data connection purposes.


Messaging application was updated as well and conversations are now displayed inside color balloons.


Colors have been now added to the icons present in the settings menu, making user experience more eye-appealing. The phone sports all the normal sensors, such as proximity, light and gravity.


It also natively supports portable Wi-Fi hotspot feature, letting the user share data connection over a wireless network.


Just like on previous MT6516 based smartphones, in the new MT65x3 platform, the feature to schedule power on / off is still present. Again, this feature must be evidenced because it can't be found in many smartphones.


Given that G11i is a clone, people might be worried that not all features work, but that is not true. The user can achieve the full Android user experience. It features full Android Market access, provided by the latest version of the application.


The latest version of Google Maps is installed as well.


Other than that, Skype (version 2.0.0.45+) works like it is supposed to and there's already modified version of the Adobe Flash Player application working on ARMv6 devices.

In terms of GSM reception, G11i performs greatly and beats any other clones. Yesterday, I had the opportunity to test a call in a place where I normally couldn't establish it, while using my HD9. Sound quality is clear enough and microphone quality seems to be pretty decent because people tell me that they can hear me perfectly.


Photos and videos

Camera interface provides enough manual controls, such as the ability to modify exposure, contrast, saturation, to enable the user to perfectly capture specific shots in all of their glory. And finally, its vast mix of effects will entertain just about anyone who wants to add a sprinkling of quirkiness or fun to their shots.


When switched to video recording mode, it can be noticed that effects can be applied as well. The maximum video quality is 480p.


MT6513 chipset and benchmarks

MT6513 chipset features a 650 MHz ARM11 processor and a PowerVR SGX531 graphical processor, thus providing support for advanced 3D graphics.

Although I'm not a big fan of benchmarking applications, I just decided to do some benchmarks in order to show the huge differences of G11i when compared to HD9 (MT6513 versus MT6516).

 G11i benchmark scores

HD9 benchmark scores

HD9 wasn't even able to run all the 3D rendering tests, while G11i behaved pretty well. With the same microSD memory card (class 10), the full write speeds can only be reached with G11i.

It's obvious that the comparison between MT6513 and the old MT6516 is not that fair, but in order to see how great the MT6513 performance is, here you have also the benchmark results of HD958 (which is based on MSM7227 chipset):

HD958 benchmark scores

I wasn't expecting to see such a difference between G11i and HD958, but the fact is that there are notorious differences between MT6513 and MSM7227. Not much in terms of CPU (only 650 MHz against 600 MHz), but specially in terms of 3D graphics. The GPU integrated on MT65x3 - PowerVR™ SGX531 - completely outperforms the one used in MSM7227 - Adreno 200.

Video reviews

Here's a video review:


Final thoughts

This was definitely the successor of my HD9. It performs much better than I expected and is indeed a great phone. MediaTek did a good job with the release of the new MT65x3 platform... and, although a little bit late, it was really worth the wait. If people ask me, MT65x3 surely beats MSM7227, not even for the better CPU and GPU performances, but also for the beautiful dual SIM user interface.

Highs:
  • Based on Android 2.3 (Gingerbread)
  • Beautiful and renewed Dual SIM user interface
Lows:
  • Lack of 3G support

Friday, 26 August 2011

MT65x3 based smartphones are coming...


The first prototypes started to appear in June, but only in August we had the chance to see the first smartphones based on the new chipsets being sold.

MediaTek released two versions of the new MT65x3 platform: MT6513 and MT6573. 

The first one, MT6513, is the low-end version, and it can be considered the direct successor of the old MT6516. This chipset supports Quad-band GSM and GPRS / EDGE data connections. It features an ARM11™ processor running at 650 MHz as well as support for advanced 3D graphics. The high-end version is MT6573, has all the same features as it's little brother, but also integrates a 3G / HSPA modem supporting mobile broadband rates of up to 7,2 Mbps downlink and 5,76 Mbps uplink.


From several video reviews that are appearing on the web, it can be noticed that these chipsets provide a good Android user experience. Personally, I have many faith on these new MediaTek chipsets and will soon be reviewing one MT6513 based smartphone. Keep posted!

Wednesday, 6 July 2011

HD958 (Dual SIM with 3G support)

Introduction

The so long waited dual SIM smartphones with 3G capabilities are now entering the market. One of the first of its kind is the HD958, from HOTWith the introduction of the low-cost Qualcomm MSM7227 chipset, it becames quite a feasible option for dual SIM smartphone manufacturers because it offers advanced processing and rich multimedia while supporting HSDPA/HSUPA for broadband data speeds over 3G networks.

As of today, HD958 runs Android OS, in its version 2.2 (Froyo), although it's announced that an update to version 2.3 (Gingerbread) will be released in the future.

Specifications

Chipset

Name:Qualcomm MSM7227
CPU:600 MHz ARM11™
GPU:Adreno 200
Instruction set:ARMv6

Software environment

Embedded:OS: Android 2.2.1 (Froyo)

Body

Dimensions
(width x height x depth):
118 x 61 x 12.8 millimetres
Weigth:147 grams
Color:Black

Battery

Capacity: 1850 mAh

Memory

RAM:capacity:512 MB
ROM-capacity:512 MB
Expansion slot:microSD memory card, supporting up to 32 GB

Network support

Primary phone:GSM850, GSM900, GSM1800, GSM1900, UMTS900, UMTS2100
Secondary phone:GSM850, GSM900, GSM1800, GSM1900
Data links:GPRS, EDGE, HSDPA, HSUPA

Display

Type:Sharp LCD capacitive touchscreen
Size:3.8 inches, WVGA resolution (480 x 800 pixels)

Camera

Main (rear):5 megapixels with autofocus
Secondary (front):0.3 megapixels

Interfaces

Bluetooth (802.15):Bluetooth 2.1 + Enhanced Data Rate
Wireless LAN / Wi-Fi (802.11):  IEEE 802.11b, IEEE 802.11g
USB:USB 2.0 Client, Hi-Speed (480 Mbit/s)
USB Series Micro-B (Micro-USB) connector

Satellite navigation

Built-in GPS module:SiRF III chipset
GPS antenna:Internal
Complementary GPS services:  A-GPS (Assisted GPS)

Additional features

Sensors:
Gravity, Proximity and Light sensors
Analog Radio:FM radio (87.5-108 MHz)

The phone...

This phone is also delivered with two batteries, or else it would not be a Chinese product... it also includes an earphone, wall charger, USB cable and a 2 GB microSD memory card.


The quality of materials seems to be good. I would prefer a different way of removing the cover as it is not easy to open and demands an extra care not to break the cover.


Although you can see the HTC logo on the back cover, this phone is not a HTC clone... or at least, any that I know of.


The connection to the charger / PC is not at the bottom, as usually, but on the lower right side, while the 3,5 mm headphone jack is on the top along with the power button.


It features four soft buttons (home, menu, back and search), which I personally like as there is not need to press hard to access that function.


Under the battery, you have access to the two SIM slots, as well as the microSD slot, thus the memory card is not hot-swappable. 


Display quality and touch-screen

I would say that the display used in this phone is of a great quality. Colors are much vivid, and due to the presence of a light sensor you can activate the automatic brightness control which may be a battery life saver after all. 


The display is capacitive, which means that you don't need to press the screen in order to do the action you want. The response to the touch is good and I don't have nothing to complain about that.


Functionality

Differences in the user experience with the HD958 are quite noticeable when compared to the HD9. The processor that is present on the used Qualcomm chipset behaves nicely, but the obvious and huge improvements are noticed in applications that require graphical processing (like games), due to hardware-accelerated 3D graphics.

The dual SIM integration is much like the HD9, just with some cosmetic changes, so there's no need to detail that.

One great feature present in Android 2.2 and enabled natively in this phone is the ability to share its mobile data connection not only via USB, but also as a portable Wi-Fi hotspot. Data connection can be easily shared with any other devices, anywhere. While a dual SIM phone is usually used for GSM calls on both SIM cards (for example, one for professional and another for personal use), with this feature and the support of broadband data connections, you can also have a SIM card with a dedicated data subscription and the other can be used for GSM calls.

One of the first tests I had to do with this phone was to establish an Internet connection, start surfing and check if I could receive a call on the other card. The test was partially successful... I say partially because the call can be received, which means that you won't get unreachable, but the data connection is broken. Only after the end of call, the data connection will be re-established. As you may know, there are not many dual SIM smartphones that let you establish a call on one SIM and have the ability to receive a call on the other. This phone is no exception, so while a call is being made in one SIM, the other will be temporarily "off" until the call ends.


User can also enable or disable data access over mobile network for each SIM, as well as other GSM/UMTS configurations.


As far as the GSM reception concerns, it seems to have improved in this phone. In the same spots that I normally had network breakdowns with the HD9, I don't have it any more with the HD958. During the past week I have never noticed the "restricted access changed" notification, so much common on the HD9. In terms of call quality it is pretty good, and people don't complain any more that the volume of my voice is too low.

One more thing that will make some people very happy is that Skype (version 2.0.0.45+) now works. In previous Chinese smartphones, Skype had a problem (although also present in many other branded Android smartphones), that would lead to an infinite loop during sign-in. 

Video review

Here's a video review:


Final thoughts

As already stated, the used processor makes the difference. I only wish that my HD9 had this processor, as I like its big screen. Nevertheless, this is a great phone and for some people, the 3.8 inch screen is the perfect dimension.

Highs:
  • Dual SIM Dual Standby with 3G support
Lows:
  • Lack of camera LED flash
  • Should have been released already with Android 2.3, although it will be updated in the future 

Saturday, 16 April 2011

Aphone A6 Pro (Dual SIM)

Introduction

Again, a dual SIM dual standby smartphone, also based on a MediaTek chipset. Aphone A6 Pro is an iPhone 4 clone that runs Android OS.

Specifications

Chipset

Name:MediaTek MT6516
CPU:416 MHz ARM9™
Instruction set:ARMv5

Software environment

Embedded:OS: Android 2.2.1 (Froyo)

Body

Dimensions
(width x height x depth):
117 x 62.5 x 9.9 millimetres
Weigth:150 grams
Color:Black

Memory

RAM:capacity:256 MB
ROM-capacity:512 MB
Expansion slot:microSD memory card, supporting up to 16 GB

Network support

Primary phone:GSM850, GSM900, GSM1800, GSM1900
Secondary phone:GSM850, GSM900, GSM1800, GSM1900
Data links:GPRS, EDGE

Display

Type:LCD capacitive touchscreen
Size:3.5 inches, HVGA resolution (320 x 480 pixels)

Camera

Main (rear):5 megapixels (interpolated) with autofocus
Secondary (front):None

Interfaces

Bluetooth (802.15):Bluetooth 2.0 + Enhanced Data Rate
Wireless LAN / Wi-Fi (802.11):  IEEE 802.11b, IEEE 802.11g
USB:USB 2.0 Client, Hi-Speed (480 Mbit/s)
USB special connector

Satellite navigation

Built-in GPS module:MT6620 chipset
GPS antenna:Internal
Complementary GPS services:  A-GPS (Assisted GPS)

Additional features

Sensors:
Gravity and Proximity sensors
Analog Radio:FM radio (87.5-108 MHz)

Construction

This clone is very similar to the original iPhone 4 and as soon as you get it on your hands you'll notice that it was really well built.


The connector to charger / PC is on the bottom of the phone and the 3,5 mm headphone jack is on the top along with the power button.


Without back cover and the battery, you have the access to the two SIM slots. The one in the bottom is the SIM2 slot, while the upper one is the SIM1 slot. You can also see the microSD slot on the right. 


Functionality

I won't detail so much about the functionality because it has the same features as the HD9. Due to the lower screen resolution (A6 has HVGA screen resolution) when compared to the HD9 (with WVGA screen resolution), you get a noticeable speed increase. And of course, the screen is smaller, which also helps in terms of battery life. With a moderate phone usage, I've noticed that battery can last three days without putting it into charge.

This smartphone comes with a pre-installed Android ROM that includes an iOS theme, making it look almost like the original. If you like, you can then flash the ROM with the pure Android interface.

Video review

I guess that more than reading, you like to see it running, so here's a video of A6:


This video was made with the Android pure UI ROM. If you like you can see the next video, which shows the phone running the original ROM, with the iOS theme.


Final thoughts

As you can see from the video, phone runs Android very smoothly. This is obviously the right resolution (HVGA) for the used processor.

Highs:
  • Dual SIM Dual Standby
  • Great battery life for a dual SIM smartphone
Lows:
  • Doesn't support 3G networks

Sunday, 13 February 2011

MT6516 flashing tutorial

Here you can find the instructions on how to flash your MT6516 based phone. Although example images shown here refer to HOT HD9, you can flash other phones based on this MediaTek chipset, with the correct ROM files, of course.

Make sure you read everything carefully and know what you are doing. Don't blame me for any damage on your phone.


What's needed:
  • Flashing cable (USB to UART cable with PL2303 chip)
         USB to UART cable                      Pinout (phone side)
  • USB data cable
  • Profilic PL2303 drivers
  • MediaTek USB VCOM drivers
  • SP Flash Tool (v1.1110 or higher)
  • SN Write Tool (alternatively Maui META or WriteCode can be used as well)

And now the tutorial...
  • Make sure that you have already installed the Profilic PL2303 drivers needed for the USB to 3,5 mm headphone cable.
  • Open SP Flash Tool for MT6516 and chose which system you want to flash in your HD9. Under project you are able to choose Android or Windows Mobile.
  • Make sure you have selected the right COM port is selected and that baud rate is set to 921600 bps.
  • Click on Format to literally format NAND flash of your HD9.
  • Then turn off your HD9, remove the battery and plug the serial cable to the PC and the jack to the phone.
  • Click Start, replace the battery and press power button for a few seconds until you see the red progress bar along with the message Format All is Processing.
  • After the red progress bar is complete, the real format will begin and a green progress bar will appear.
  • When the process is finished a new window will pop up, just press OK to continue.

  • Now remove the battery once again, keeping the serial cable connected to the PC and the phone.
  • Click Download and make sure that every file needed to flash Android / Windows Mobile is selected:
    • Android
      • BK Modem DB / RS Modem DB - BPLGUInfoCustomApp_MT6516_S01_MAUI_10A_W10_48
      • BK AP DB / RS Modem DB - APDB_MT6516_S00_2010_20
      • PRELOADER - preloader_bird16_a10y.bin
      • UBOOT - uboot_bird16_a10y.bin
      • BOOTIMG - boot.img
      • RECOVERY - recovery.img
      • SEC_RO - secro.img
      • ANDROID - system.img
      • LOGO - logo.bin
      • USERDATA - userdata.img
    • Windows Mobile
      • BK Modem DB / RS Modem DB - BPLGUInfoCustomApp_MT6516_S01_MAUI_09B_W10_16_MP_V5
      • BK AP DB / RS Modem DB - APDB_MT6516_S00_2010_20
      • FLASH BIN file - flash.bin
      • XLDR - MT6516_mldrnandforMTK.nb0
      • EBOOT - MT6516_EBOOTNAND.nb0

  • Click Start, replace the battery and press power button for a few seconds until you see the red progress bar along with the message Download is Processing.
  •  After the red progress bar is complete, there will appear a purple progress bar.
  • Right after the purple progress bar is complete, you’ll have to connect the normal USB data cable. The message will appear under the progress bar: “Please insert USB cable in x seconds”.
  • After plugging the USB  data cable into the phone the download will start. The first time you connect the cable, your computer will detect a new hardware and you’ll have to install MT6516 USB VCOM drivers.
  • There will be one yellow progress bar for every part of the ROM (preloader to userdata / xldr to eboot).
  • After all is complete a new window will appear with a report of the download. The following popup should appear:

  • Now you have completed the process of flashing the ROM into your HD9. Because the NAND flash was formatted in the beginning of the flash progress, you have now to re-write your phone IMEI1 and IMEI2.
  • Open SN Write Tool and make sure that the correct COM port is selected and baud rate is set to 115200 bps.
  • While keeping only serial cable connected to the phone, remove the battery and wait 10 seconds with the battery removed.
  • Click Start and you be asked to enter IMEI1 and IMEI2. Enter the correct number in the correct fields.
  • After entering the correct IMEI numbers and clicking OK, you have to replace the battery and press power button on the phone. If you have flashed Android, => Meta mode will appear in the bottom left of the screen.

Attention: Please follow the instructions carefully. I will not take any responsibility on whatever may happen with your phone.

Note: All needed tools and drivers can be downloaded from my MT6516 Tools 4shared folder. The password to login is bm-smartphone-reviews.blogspot.com. Have fun.

Update: Here's a trick if you want to flash just one part of the ROM, in this case the recovery. Without formatting flash, deselect all parts except the one you want to flash.


After that, you just have to click start and turn on the phone with USB data cable connected (in this case you don't need the USB serial cable).