Pages

Subscribe:

Labels

Thursday, 19 April 2012

Creating a ROM dump of your MT65x3 device

Well, I have decided to create this tutorial for those that wish to create a backup of the stock ROM installed on their MT65x3 based smartphones. This is actually the only working method for non-rooted phones.

I assume that you are already familiar with SP Flash Tool, but if not, just read my MT65x3 flashing tutorial.

First of all, you have to know the MTD partition table of your device. If you already have ADB installed on your computer, launch a Command Prompt / Terminal window on your computer and enter the following commands:

adb shell
cat /proc/mtd

The result should be something like this (please note that it can be different on your phone):


Copy the output into a file named firmware.info or alternatively, simply run the following commands to create that file on your SD card:

adb shell
cat /proc/mtd > /sdcard/firmware.info

After that, use MT65xx ROM Studio (thanks to linerty) to load firmware.info and generate the corresponding scatter file that will be needed for SP Flash Tool.


Make sure that the latest MT65x3 USB VCOM drivers are installed, open SP Flash Tool and mark USB Mode under Options tab.


Load the previously generated scatter file (MT6573_Android_scatter.txt) and ignore any message that may appear.


It can be noticed that every partition has it's begin address... Using a hexadecimal calculator you can easily determine the size of each partition. For example, let's say that you wish to backup the boot image (BOOTIMG partition), taking into consideration that it begins on 0x00480000 and the next partition begins on 0x00A80000, then the partition size is 0x00600000.

After having determined the partition size, select the "Read back" tab and this screen should appear:


Now you should edit the entry, enter a name for the backup file and the details that were previously determined (start address and length). Be sure to select the correct read method: Read Page Only.


Close the window and press F10 (or hit Read back button - the third one with an arrow). Now, with your phone completely turned off (to make sure your phone is completely turned off, remove the battery and replace it after a few seconds), hold VOL-UP button and connect the USB data cable into your phone. The process will start as soon as you see the red progress bar.


Followed by the blue progress bar...


When finished, you should see the green circle.


There you go, you have successfully made a backup of your boot.img. If you wish to backup more NAND partitions, just add more entries to the read back list.


Attention: Please follow the instructions carefully. I will not take any responsibility on whatever may happen with your phone.

Saturday, 24 March 2012

Increasing G11i Pro and HD7 internal memory

For those that have been following my G11i Pro or HD7 support threads (here and here, respectively), you may have noticed that my latest custom ROMs now support ext2 file system (thanks to casacristo).

That means you can now use Android App2SD scripts and increase your phone's internal memory. I will detail here the step-by-step instructions in order to achieve that.


Okay, let's start:
  • Install my latest custom ROM
  • Partition your SD card (create a FAT or FAT32 partition, an ext2 partition and optionally a swap partition)
This can be done in two different ways (beware to backup the contents of your SD card first as it will be completely erased):
  • Using the feature integrated into my custom recovery (for that you have to reboot into recovery again so that the phone can assume the newly flashed recovery image). Follow the instructions on this guide, on paragraph 8.6.


    Delete the old partition on the SD card:
    Create the first partition, set it to primary and choose FAT if you have a 2GB or smaller card or FAT32 if you have 4GB or greater card:
    Then, create the second partition, set it to primary as well (very important) and choose ext2:
    Optionally, you can create a third partition for swap. In order to finish, click apply so that the partitions are created and card is formatted.
  • Boot your phone for the first time and let all userdata and Dalvik cache be created
  • Optionally, at this point you can restore some of your applications
  • Disable Quick boot (under Settings / Accessibility)


  • Install your preferred app2sd script (you can grab a modified version of ad2sdx from here, which is the script that I actually recommend to be installed)
Copy over the script file into /system/etc/init.d folder:
And make sure that you set the proper permissions to the file:
 
  • Reboot the phone once after the script installation (you may probably notice that SIM cards are not detected but that is perfectly normal)
  • Wait a minute or so and then reboot the phone again

Now, enjoy the increased space for lots of applications and games:


Important notes:

  • Do not try this with a slow SD card or else phone performance will became really sluggish. In order to get a good experience, a class 6 or higher SD card must be used.
  • Set a maximum of 1GB for the size of the ext2 partition. That should be more than enough!

Saturday, 25 February 2012

Complete guide to ClockworkMod Recovery

ClockworkMod – also known as Clockwork and CWM – is a custom recovery for Android phones and tablets that allows you to perform several advanced recovery, restoration, installation and maintenance operations on your Android device that are not possible with the stock recovery. This guide will cover all that this recovery is capable of doing, and how to do it.

Here is what shall be covered in this guide:
  • About Android recovery
  • Introduction to ClockworkMod
  • Installing ClockworkMod
  • Booting into ClockworkMod
  • Feature tour

Now let's take a look at each of these topics in detail.


About Android Recovery

All Android devices are shipped with a recovery console that is basically a partition on the device's internal memory and can be booted into. The stock recovery of almost all Android devices provides a few basic yet handy options that allow you to factory reset your device and also to recover its operating system using an official ROM in zip format, but that is all you can do with it. That's where a custom recovery comes handy...

A custom Android recovery basically replaces the stock recovery with one that lets you do all you can do with the stock recovery, plus a plethora of more options to give you a lot more control on your device. With a custom recovery, you can install official and unofficial ROMs as well as other updates including apps, themes, kernels etc. using zip files, wipe not just user data but pretty much every partition on your device, mount the storage card for USB mass storage access without leaving recovery, partition your SD card, wipe Dalvik cache and battery stats, fix permissions, perform, manage and restore backups and so on.


Introduction To ClockworkMod

ClockworkMod recovery is one of the most widely used custom Android recoveries that is available for most mainstream Android devices. This recovery has been developed by Koushik Dutta (also known as Koush) – the creator of Android ROM Manager.


Installing ClockworkMod

What sets ClockworkMod recovery apart from most other custom Android recoveries is its dead simple installation process on most devices. It does require you to fully root your device in order to be installed but once rooted, installing it is as simple as installing ROM Manager and choosing the proper option.

However, in certain cases, this ROM Manager method will not work. That is the case for MediaTek chipset based devices and here is a warning for any owner of such a device: don't use ROM Manager or else you'll get a brick!!!

For those, the method you should follow in order to install ClockworkMod recovery is described on both my MT65x3 and MT6516 flashing tutorials:


Please note that those are just generic flashing tutorials. You need to find the ClockworkMod recovery image specifically designed for your device.


Booting Into ClockworkMod

Once you have ClockworkMod recovery installed on your Android device, booting into it is quite simple:

  • Using hardware button combination on most Android devices:
On most Android devices including ones by HTC, you can enter recovery by powering your device off and then powering it back on while keeping either the ‘Volume-Down’ or the ‘Volume-Up’ button pressed, depending on the device. This will enter the bootloader from where you can select the ‘RECOVERY’ option by navigating to it with the Volume key and entering it with the ‘Power’ key.
On MediaTek chipset based devices, such as G11i Pro, the method is the same as above, except that in this case the device will to boot directly into recovery mode. In very rare cases, the device needs to be connected to the computer via the normal USB data cable.
On most Samsung devices, specifically Samsung Galaxy S series devices, you must keep both the ‘Volume-Up’ and ‘Home’ keys pressed while powering on the device, to directly enter recovery. 

  • Using ADB (for advanced users):
If you have ADB installed on your computer, you can simply enable USB debugging mode on your device from Settings > Applications > Development, connect it to your computer via USB, launch a Command Prompt / Terminal window on your computer and enter this command: 
adb reboot recovery

  • Using extended power menu on your Android device:
This is another way of booting into recovery, but please note that the extended power menu is only present on some custom ROMs.


Feature Tour

Let's now take a look at all the options CWM recovery offers you to manage your Android device. In this example, the phone used was my G11i Pro running ClockworkMod recovery 5.0.2.8 but the details should apply to other devices and other 3+ versions of the recovery as well.

This is what you see when you reboot your device into ClockworkMod recovery:


You can navigate these options by using the ‘Volume-Up’ and ‘Volume-Down’ keys to highlight an option and the ‘Power’ key to enter / launch the highlighted option on most Android devices. On devices equipped with a trackball or an optical track pad such as G1, G2, Nexus One, HTC Desire etc., the trackball or track pad can be used for navigation and clicking it can be used to enter / launch the selected option. Let's review each of these options and their sub-menu options in detail.

    1 - reboot system now
    This one is self-explanatory.

    2 - apply update from sdcard
    This can be used for installation of any official or unofficial update, ROM, kernel, theme etc. that is in a zip format installable from recovery, as long as the file is named update.zip and it has been placed on the root of your SD card (i.e. not in any sub-folder). Selecting this option (and most of the options featured below) will bring up the following confirmation prompt (which you may find annoying but can avoid problems caused by accidental key presses):


    3 - wipe data/factory reset
    This option wipes all user data on the device as well as cache. Doing this will leave your phone in the state it was in when you bought it or when any custom ROM was first installed. It will also wipe any sd-ext partition that you might have setup (more on this later).

    4 - wipe cache partition
    Wipes the cache partition of the device to clear all the data accumulated there over use. This is often used before installing a new ROM, app, kernel or any similar mod via recovery.

    5 - install zip from sdcard
    This option brings up the following sub-menu:


    5.1 - apply /sdcard/update.zip
    This one is essentially the same as the apply update from sdcard option of the main menu.
    5.2 - choose zip from sdcard
    Lets you install any zip file (with any name) from any location on your SD card. The file can be for a ROM, a kernel, an application, a theme or any mod as long as it is in recovery-flashable zip format. This is the most widely used option for installing a ROM that you have downloaded and copied to your SD card. Entering this option will bring up a screen that will allow you to browse your SD card for the zip file and select it for installation as in this screenshot:


    5.3 - toggle signature verification
    Turns the signature verification on and off. When signature verification is on, you will not be able to install any custom ROMs that haven't been signed by the developers (most custom ROMs aren't signed). Switching it off skips the signature verification check and proceeds with the installation.
    5.4 - toggle script asserts
    Seldom-used option for a vast majority of users. It simply turns script asserts on or off. If you don't know about these, it's best not to change this option.
    5.5 - +++++Go Back+++++
    Takes you back to the main recovery menu, obviously!

    6 - backup and restore
    This is without any doubt one of the most important features provided by a custom recovery, the backup and restore feature – also known as Nandroid backup – allows you to take a snapshot of your phone's entire internal memory including all partitions, and save it on the SD card. Here is how it looks:


    6.1 - Backup
    Takes a Nandroid backup, as explained above.
    6.2 - Restore
    Lets you restore a previously taken backup. Entering this option presents you with a list of existing backups from the SD card that you can choose from for restoration.
    6.3 - Advanced Restore
    This option is similar to the Restore option but once a backup has been selected to be restored, this option allows you to choose what parts of it to restore. You can choose to restore the boot, system, data, cache and sd-ext partitions, as shown here:


    7 - mounts and storage
    Allows you to perform maintenance tasks on all the internal and external partitions of your android device:


    7.1 - mount/unmount /system, /data, /cache, /sdcard or /sd-ext
    These options let you toggle between mounting or unmounting these respective partitions. Most users don't need to change these options.
    7.2 - format boot, system, data, cache, sdcard or sd-ext
    These let you directly format any of these partitions. Take extreme care with this option as formatting any of these partitions will result in losing all data on them, especially the boot and system partitions. Formatting the system partition will remove your ROM and leave your phone without an operating system while wiping the boot partition may brick your phone unless you restore or flash another one before rebooting your device. To learn more about the contents of all these partitions, see our guide to Android partitions.
    7.3 - mount USB storage
    Lets you enable USB mass storage mode for your SD card right from recovery so that you can connect it to your computer via USB and transfer any files to/from it without having to leave recovery.

    8 - advanced
    This section contains a few options most users will not require, though these can come handy quite often, especially wiping Dalvik cache, which is required before most ROM installations. Here are the options from this section:


    8.1 - Reboot Recovery
    Lets you directly and very conveniently reboot from recovery right back into recovery. This is useful option for certain back-to-back installations that require the device to at least boot once between them.
    8.2 - Wipe Dalvik Cache
    Allows you to wipe the cache for the Dalvik virtual machine (the custom-built Java virtual machine for Android).This is required before most ROM installations and at other occasions too, for fixing some problems.
    8.3 - Wipe Battery Stats
    Wipes the saved battery usage statistics and effectively recalibrates the battery. Useful in various scenarios when Android is not showing correct battery levels.
    8.4 - Report Error
    In case of errors, this feature can be used to save a log of recent ClockworkMod recovery operations on the SD card that you can later report from Android using ROM Manager.
    8.5 - Key Test
    Lets you press any of the hardware keys to see if they are properly functioning, and to see their key codes.
    8.6 - Partition SD Card
    This option gives you a no-frills way to partition your SD card properly for use with ROMs that support data2ext (a very handy hack for low internal memory devices that enables an /sd-ext partition on the SD card to be used as the internal user data storage i.e. as the /data partition). Once this option is selected, you will be given options to choose the sizes for the /sd-ext partition as well as an optional /swap partition on the SD card, and will then automatically format it for you, leaving the remaining space for normal SD card usage. This option will wipe all data from your SD card so use it with caution!


    8.7 - Fix Permissions
    Fixes the file permissions for the internal memory partitions back to default. This is very useful as a fix for several errors and Force-Closes that start appearing after you or an application you installed and provided root access end up messing up the permissions of important files.

    9 - power off
    Do I need to tell you what it does? 

Well... that's all you need to know about ClockworkMod recovery.

Saturday, 18 February 2012

MT6575 launch officially announced

MediaTek has officially announced the launch of the new MT6575 platform for Android smartphones. According to the company, it is ideal for entry and mid-range Android smartphones. MT6575 comes with a single core ARM Cortex™-A9 processor clocked at 1 GHz and supports the latest Android version “Ice Cream Sandwich”.

MT6575 also supports 720p playback, 8MP camera, qHD resolution (960x540) and 3D displays, thanks to the PowerVR™ SGX Series 5 GPU. It has world’s lowest power consumption as well as hot swap dual-SIM capability, making it perfect for budget dual-SIM Android devices for developing markets. According to MediaTek, the MT6575 outperformed Qualcomm’s Snapdragon MSM7227A (which is its market equivalent) chipset in a series of third-party benchmarks.

The first smartphones powered by MediaTek MT6575 are expected to be out in the market in Q1 2012.

Friday, 27 January 2012

Breaking news for G11i Pro and HD7 Pro owners!!!

For those that weren't following the respective G11i Pro or HD7 Pro support threads, here are the breaking news:
Both phones can now support one of the most desired features - SIM2 will be reachable even if there's an active data connection established on SIM1. The data connection will be immediately dropped when a new call is incoming from SIM2 and the download will be automatically resumed after the call is over.


In my opinion, that's the most important feature of the newly released ROMs. Although, there are many more changes / improvements... such as battery consumption reduction, better memory management, speed improvements, many bug fixes and, of course, some cosmetics changes. Here are just a few eye candies.


For the most distracted ones, here are the links to the support threads:


Enjoy!!!

Tuesday, 17 January 2012

MediaTek working on MT6575...


It seems that MediaTek has been working on a new chipset - MT6575 - as a response against Qualcomm's MSM7227A. It's said that it will feature a single core ARM Cortex™-A9 processor clocked at up to 1 GHz and will also support HSPA+. By comparison, MT6573 is much inferior, because the used chip integrates an ARM11™ processor clocked at only 650 MHz. On the modem part, MT6573 chipset only supports data connections up to HSPA (speed of 7.2 Mbps / 5.76 Mbps).

It's expected that the first MT6575 based smartphone prototypes start appearing after the upcoming Chinese New Year. Let's wait then!

Monday, 28 November 2011

G14 (Dual SIM with 3G support)

Introduction

I have been a little busy lately, testing a new MT6573 based smartphone... and this time the review will focus on the G14, a clone of HTC Sensation.


Specifications

Chipset

Name:MediaTek MT6573
CPU:650 MHz ARM11™
GPU:PowerVR™ SGX 531
Instruction set:ARMv6

Software environment

Embedded:OS: Android 2.3.4 (Gingerbread)

Body

Dimensions
(width x height x depth):
126 x 65.4 x 11.3 millimetres
Weigth:148 grams
Color:Black

Battery

Capacity: 1500 mAh

Memory

RAM:capacity:512 MB
ROM-capacity:512 MB
Expansion slot:microSD memory card, supporting up to 32 GB

Network support

Primary phone:GSM850, GSM900, GSM1800, GSM1900, UMTS900, UMTS2100
Secondary phone:GSM850, GSM900, GSM1800, GSM1900
Data links:GPRS, EDGE, HSDPA, HSUPA

Display

Type:Sharp LCD capacitive touchscreen
Size:4.3 inches, WVGA resolution (480 x 800 pixels)

Camera

Main (rear):8 megapixels (interpolated) with autofocus and dual LED flash
Secondary (front):1.3 megapixels

Interfaces

Bluetooth (802.15):Bluetooth 2.1 + Enhanced Data Rate
Wireless LAN / Wi-Fi (802.11):  IEEE 802.11b, IEEE 802.11g
USB:USB 2.0 Client, Hi-Speed (480 Mbit/s)
USB Series Micro-B (Micro-USB) connector

Satellite navigation

Built-in GPS module:MT6620 chipset
GPS antenna:Internal
Complementary GPS services:  A-GPS (Assisted GPS), MediaTek EPO (Extended Prediction Orbit)

Additional features

Sensors:
Gravity, Proximity and Light sensors
Analog Radio:FM radio (87.5-108 MHz) with RDS radio receiver

Design and construction

The size of G14 is a little bit larger than other smartphones, in that it comes in at 11,3 mm thick - noticeably thicker than HD9, but still feeling comfortable in the hand.


The phone itself is encased in toughened plastic and aluminium (which feels more like plastic) through the stripe in the centre - the whole back of the phones pulls away from the main device, with the antenna and suchlike pumped into the chassis rather than on the phone itself.


The 3,5 mm headset jack and dedicated power button are located on the top edge. You'll also find an extra-large volume rocker on the left side, as you would on the G11i Pro.


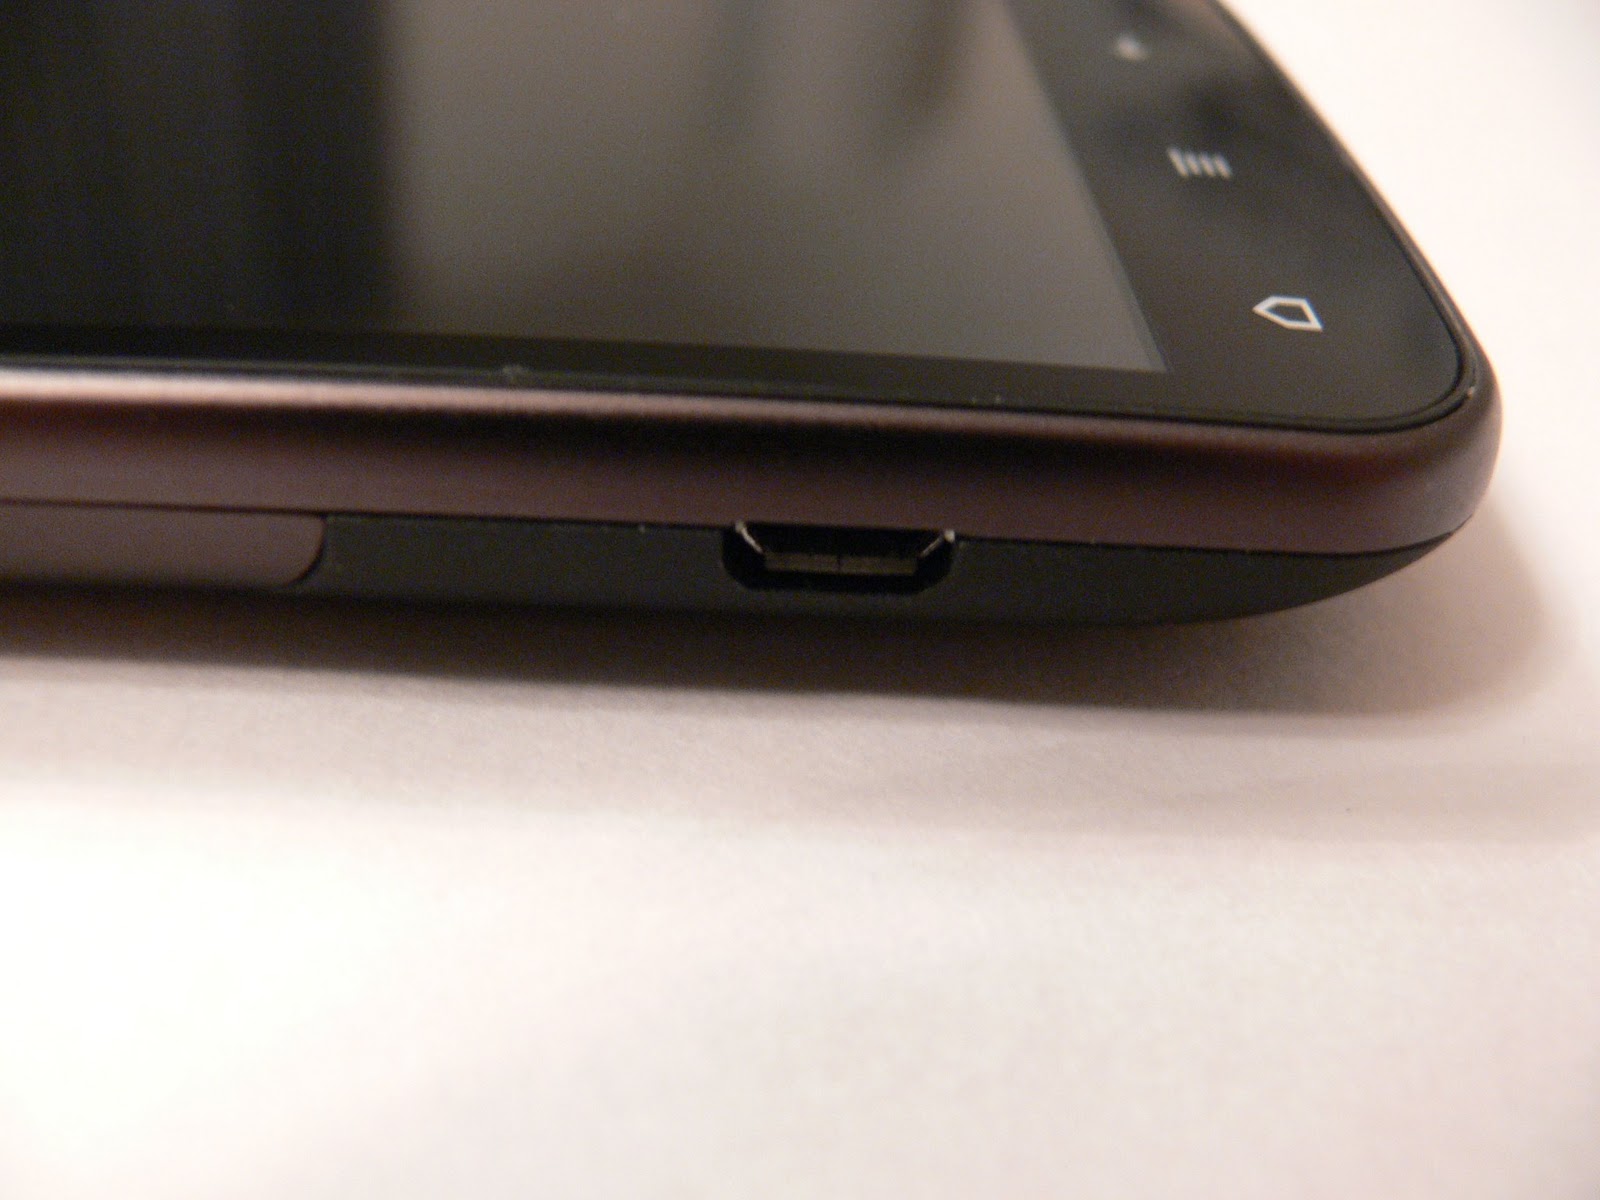
The micro-USB port is located on the left edge. I usually prefer to have it at the top or bottom so that I can use the phone -while in charge- without having the cable get in the way.


The four Android buttons on the bottom are visible at all times (even when the phone display is off). On some handsets they become invisible, to make the phone “look better” and to save on backlight power consumption.


On the back side, we find the 8 megapixels autofocus camera sat next to a dual LED flash and a single loudspeaker grille.


Getting the back of the phone off through the little catch at the bottom is much harder than it looks, with the fingers needed to prise it apart almost holding it in place at the same time - wiggling and shaking is needed to get to the battery and microSD card slot.


The two SIM slots can only be accessed after removing the battery, but the microSD slot is accessible even with battery in place.

Display quality

This phone features a new LCD from Sharp. At first glance, it can be noticed a great definition.


The only thing I can point to this display is that colours don't seem too vivid, although it may be only a matter of setting the contrast (if that's possible).

Functionality

After my previous tests with the newest version of HD9, I thought that all MT6573 phones shared the same framework (which meant that in terms of features it was pretty much the same as when compared with G11i Pro features). I was happily surprised to see that G14 has a little bit different framework. 


This new framework includes some nice CyanogenMod features, such as enhanced notification widgets.


There's a new entry on the normal settings menu, that provides access to extra settings.


Under the dual SIM management menu, the user can edit the name of each SIM and also set the associated background color that will appear in call log as well as in the notification bar (behind the network strength bars). Other than that, also in the same menu, the user has the possibility to set a default card to establish all outgoing calls or set it to always ask, thus enabling the pop up that can be seen some images above showing the dialer (with the options of which SIM card should initiate the call). The same thing can be set for messaging and data connection purposes. In addition, given that G14 supports 3G networks, the option of video calls can also be noticed.


The extra settings menu includes advanced options related with application, display, input, interface and ringtones. Within extra display settings, screen-off and screen-off animations can be configured. Amazing animations, in my opinion, which imitate the CRT screen effect.


Lots of widgets can be added to the notification panel...


During the past few weeks, I noticed that battery performance is pretty good, taking into consideration the large screen size. With moderate use, I can get the battery to last 2 to 3 days, before putting it into charge.

Final thoughts

This is a good phone for people looking for an alternative to HD9. In terms of stability, speed, call quality, it is not different than the other MT65x3 clones, which means that MediaTek really did a great job.

Highs:
  • Based on Android 2.3 (Gingerbread)
  • Beautiful and renewed Dual SIM user interface
  • Good battery life
  • Dual SIM with 3G support
Lows:
  • Display colours are not too vivid